To run a Node.js app in cPanel, clone it with Git Version Control, create it in Setup Node.js App, then build it over SSH and restart it.
This guide uses a Next.js blog as the example app. The steps are the same for any Node.js app: only the repository URL, the application root and the build commands change.
Before you begin
- SSH access to your hosting account, or Terminal in cPanel (Advanced › Terminal).
- A hosting plan that includes Setup Node.js App in cPanel.
- A domain or subdomain for the app. A subdomain such as
app.example.comis the safest choice for a first deployment. - The app's code in a Git repository, for example on GitHub.
About the example app
The example is the Next.js blog starter from the official Next.js examples. We generated it locally and published it to a public repository: https://github.com/2mhost/blog-starter-app.
The only change from the original example is in package.json: the scripts use --webpack instead of --turbopack. The scripts block looks like this:
"scripts": {
  "dev": "next dev --webpack",
  "build": "next build --webpack",
  "start": "next start"
}
Clone the repository with Git Version Control
In cPanel, Git Version Control copies the repository from GitHub into your hosting account.
- In cPanel, open Files › Git Version Control.
- Click Create.
- In Clone URL, enter
https://github.com/2mhost/blog-starter-app, or the URL of your own repository.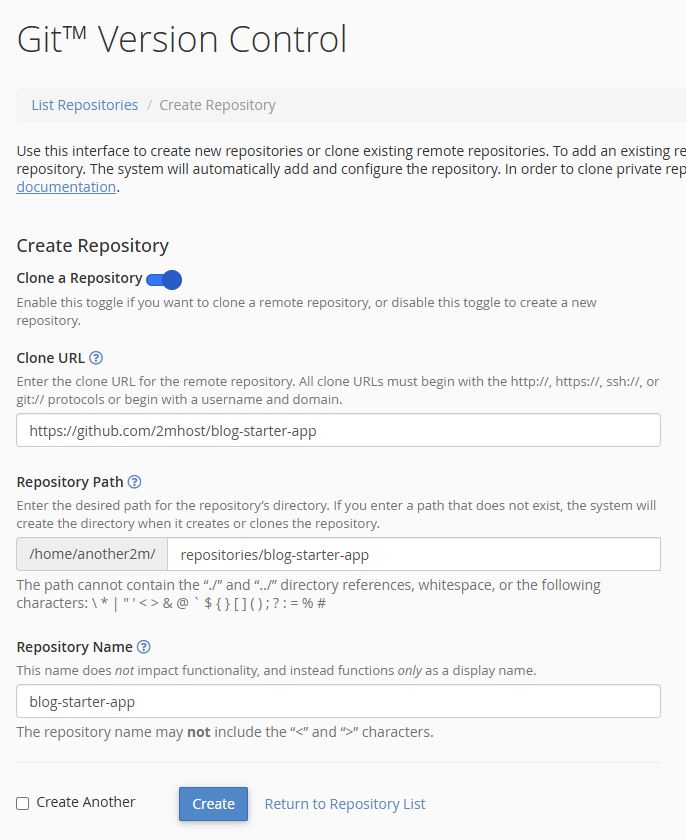
- Keep the Repository Path and Repository Name that cPanel fills in. 📝Note the path:
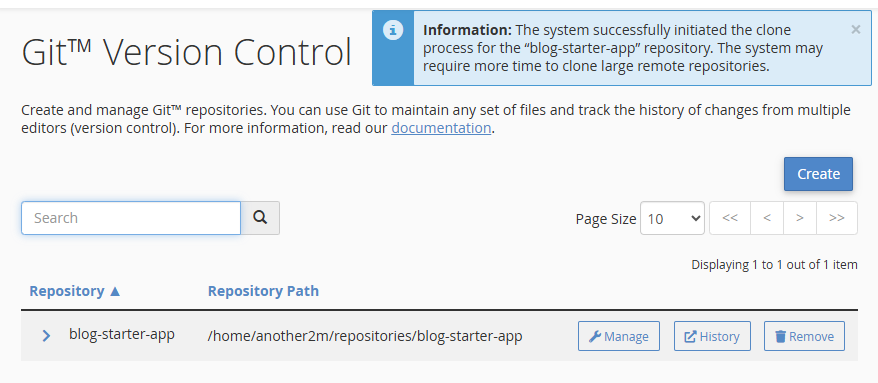
repositories/blog-starter-app. You will need it in the next section. - Click Create. A success message confirms that cPanel cloned the repository.
Create the Node.js application
In cPanel, Setup Node.js App runs your code as a web application and connects it to a domain.
- In cPanel, open Software › Setup Node.js App.
- Click Create Application.
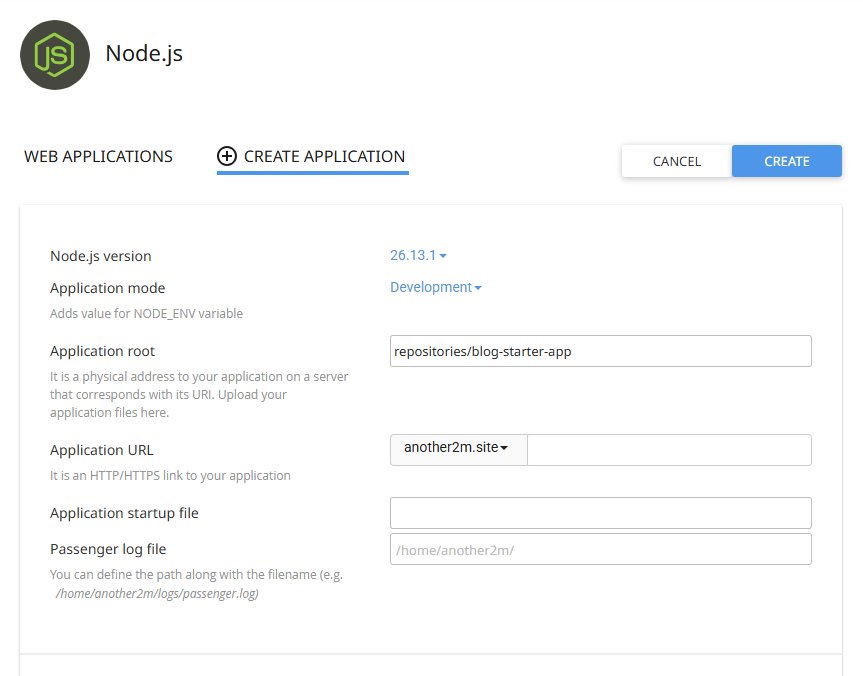
- In Node.js version, select a version your app supports. Recent Next.js versions need Node.js 20 or later.
- In Application root, enter
repositories/blog-starter-app(from the previous step). - In Application URL, select the domain or subdomain where the app should run.
- Leave the other fields at their default values.
- Click Create. The application page opens and shows the app as started.
Warning: The Node.js app takes over the domain you select in Application URL. If a website such as WordPress already runs on that domain, visitors see the Node.js app instead. Use a separate subdomain to keep your existing site online.
Install dependencies and build the app over SSH
The app needs its packages and a production build before it can run. Run these commands over SSH or in cPanel Terminal.
- In cPanel, open Software › Setup Node.js App and click the edit (pencil) icon next to your app.
cd repositories/blog-starter-app
npm install && npm run build
- Wait until the build finishes without errors. Next.js lists the built pages at the end.
Restart the app and test the website
In cPanel, restart the Node.js app so it runs the new build.
- In cPanel, open Software › Setup Node.js App.
- Click the Restart icon next to your app.
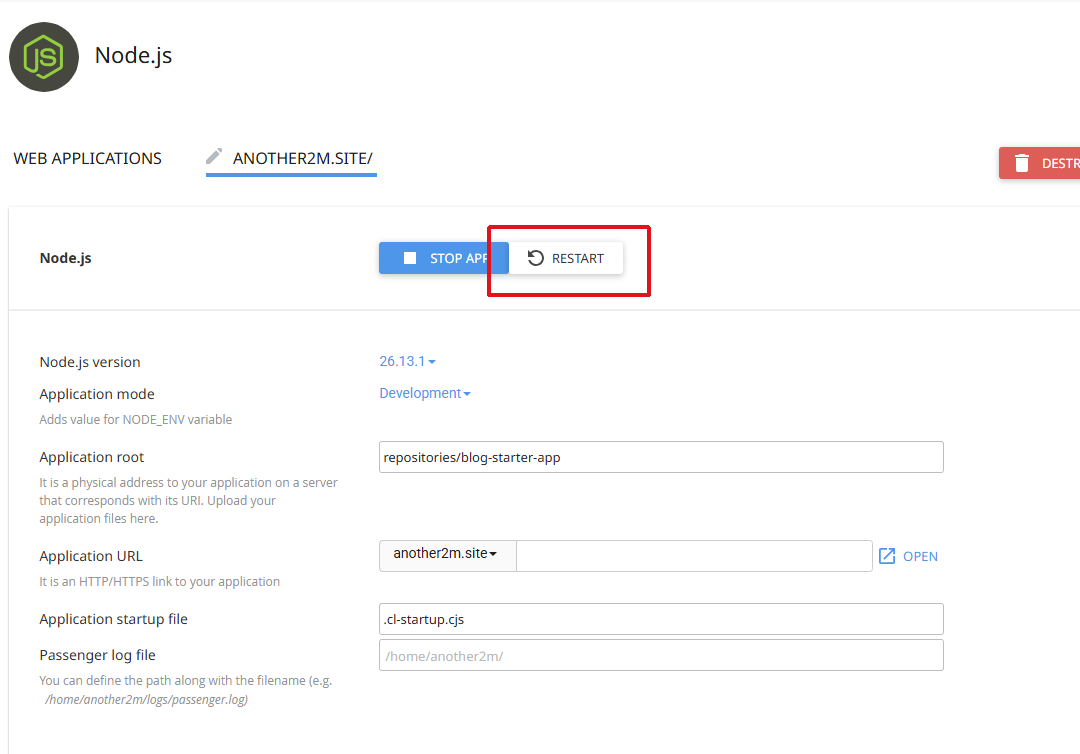
- Wait a few seconds for the app to start.
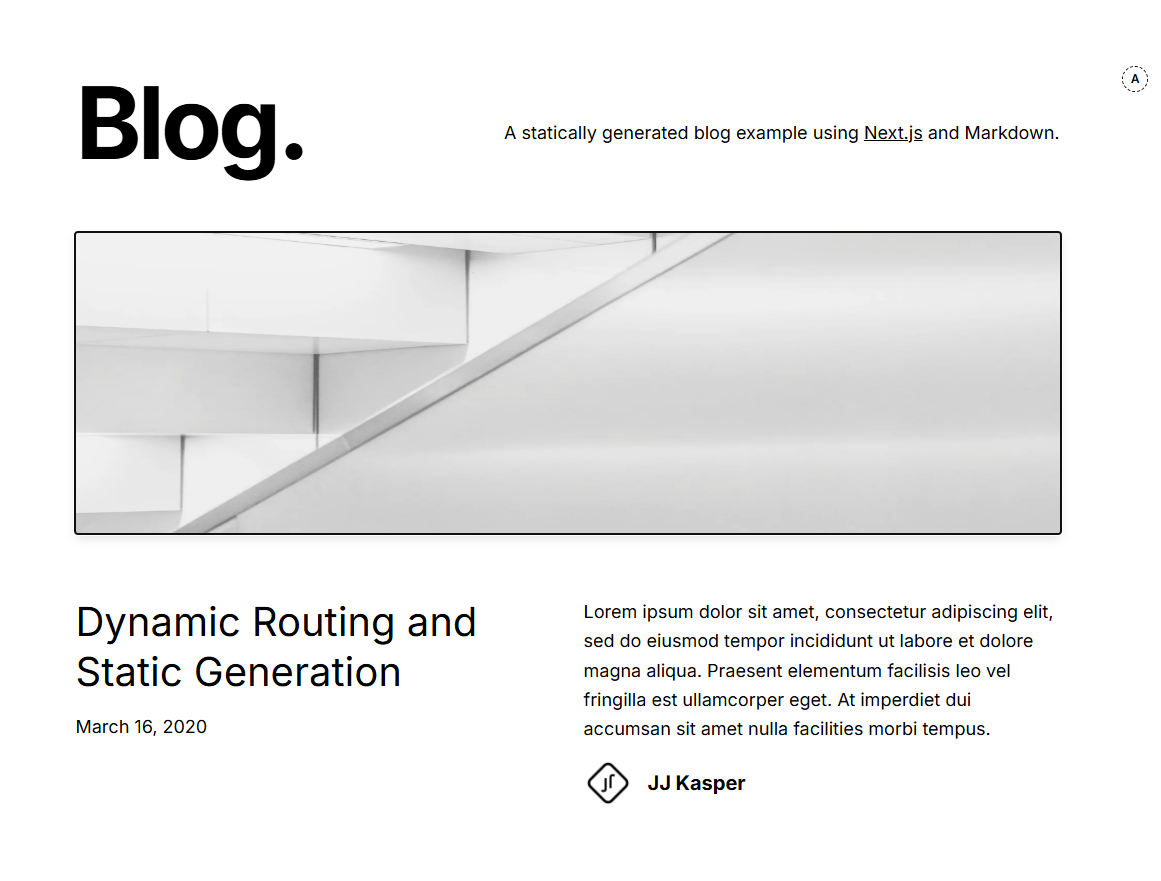
- Open your domain or subdomain in a browser. The Next.js blog home page appears.
Update the app after code changes
When you push new code to your repository, pull it into cPanel and build again.
- In cPanel, open Files › Git Version Control.
- Click Manage next to the repository.
- Open the Pull or Deploy tab and click Update from Remote.
- Over SSH, enter the virtual environment with the command from Setup Node.js App, then run
npm install && npm run buildagain. - In cPanel, open Software › Setup Node.js App and click Restart next to the app.
Troubleshooting
The build stops with "Killed" or "JavaScript heap out of memory"
The build used more memory than your hosting account allows. NodeJs build step usually uses a large amount of CPU/RAM, Personal and Starter packages resources may be not enough, you need to upgrade your package to Ready package or above, you can upgrade your account from your client area or open a help ticket.
The website shows an error or the old site after the build
The app did not restart, or it fails at startup.
- In cPanel, open Software › Setup Node.js App and click Restart next to the app.
- If the error stays, open the
stderr.logfile in the application root with File Manager and read the last lines for the cause. - Check that
npm run buildfinished without errors.
Frequently asked questions
Can I deploy a private GitHub repository?
Yes. Add an SSH key to your hosting account and to the repository, then clone with the SSH URL. See Using GIT with cPanel shared hosting.
How do I add environment variables to my app?
In cPanel, open Setup Node.js App, edit the app and click Add Variable under Environment variables. Save, then restart the app.
Do I need to keep the SSH session open for the app to run?
No. The server runs the app in the background and starts it again when needed. You only need SSH to install and build.